Has your heavy garage door started feeling sluggish when opening and closing? It may be time to replace the worn out extension springs that help lift the weight of your door. Springs are under constant pressure and stress each time the door cycles open and closed, so they do eventually need to be replaced as they fatigue over 5-10 years of use. Installing new springs yourself can save money compared to hiring a pro, but it’s definitely an advanced DIY job that requires caution due to the high tension involved. Here are the basic steps and safety precautions to follow if you decide to take on this project yourself.

Content
Inspect Your Springs
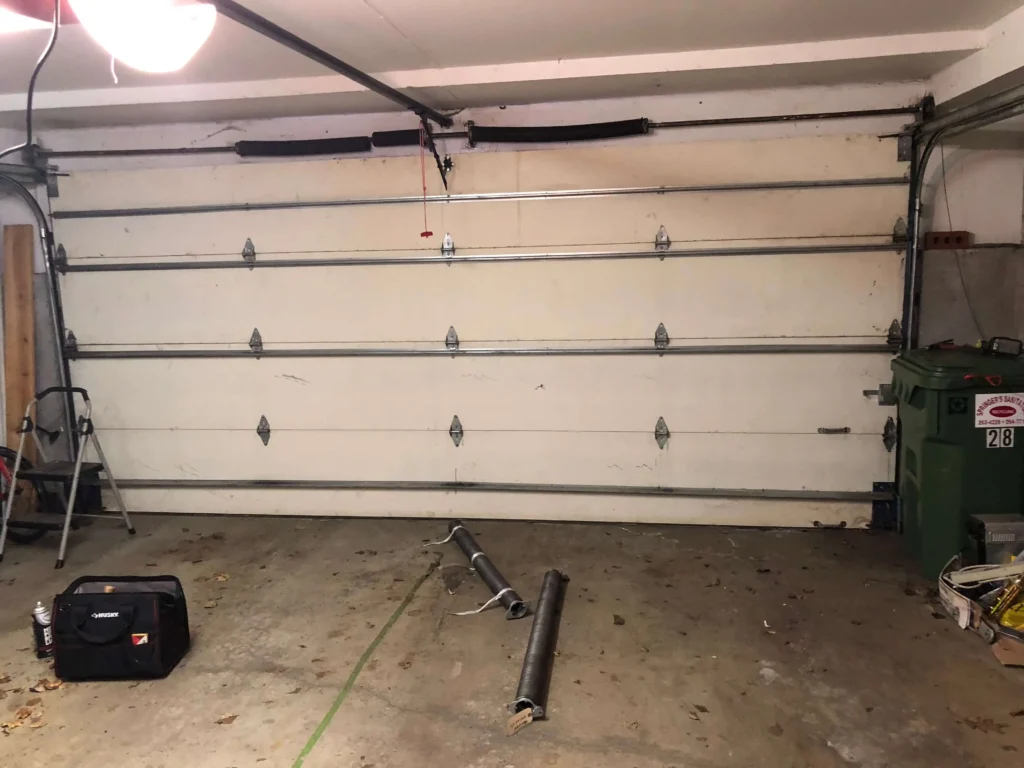
Take a close look at your existing extension springs along both sides of the garage door to check for signs of wear. Indicators that springs need replacement include coiled sections that are misshapen, severed strands of wire, or rust around the springs. You should also examine the springs for any damage from corrosion. Avoid painted springs, as the paint can hide wire breaks from view.
Purchase New Springs
Make sure to purchase the same size replacement springs as the ones currently installed, usually specified as the length, diameter and number of coils/wraps. Springs often come in sets of two. Stick with brands from a major manufacturer rather than no-name parts.
Gather Safety Tools and Equipment
Before starting, make sure to have the proper tools and safety gear. This includes gloves, safety glasses, and torsion spring winding bars or a winder tube to safely wind and load tension on the springs. You may also need wire or nylon rope, loppers or a bolt cutter, and pliers. Never use makeshift items that could slip or break under stress.
Mark Springs for Proper Positioning
To ensure your new springs install exactly like the old ones did, place masking tape on each coils to mark where it attaches to the garage door brackets and winding cone. This prevents winding errors. Photograph can also help here.
Reduce Spring Tension Safely
With all helpers and family clear of the area below, use your winding bar or tube to release 1-2 coils worth of tension from each existing spring. This prevents sudden whiplash if one breaks. Consider calling a professional like Garage Door Spring Repair in Franklin to safely decrease tension further if needed.
Remove Old Springs Carefully
While maintaining tension on the spring with your winding tool, remove mounting bolts and hardware on the ends to detach each spring carefully, one at a time. Use rope or wire around a coil as backup in case of failure. Never release the winding tool until both parts are removed.
Install New Springs Identically
Identify the spring mounting brackets and follow your marking tape or photos to position the new spring’s end coils and attach in reverse of removal using new mounting hardware. Be very cautious with the torsion spring’s power.
Securely Tension Springs Evenly
Carefully wind each spring using the same number of rotations or turns as the previous one while double checking position matches the marks or photos. Monitor tension levels and wind evenly until returning to the original installed state.
Confirm Springs are Safely Installed
Do a final check of springs’ installation positions, attachments, and tension levels before operating the door. Cycle the door fully once while ensuring springs remain properly wound and in place. Consider having a pro check your work for safety if uncertain.
With patience and caution, it is possible to replace aging extension springs yourself and save money versus hiring a professional. But these springs store a tremendous amount of power, so safety should always come before savings. Know your limit and call a qualified expert like Garage Door Spring Repair in Franklin if you have any doubts about properly completing this project independently. Your safety is absolutely not worth the risk of trying to save a few dollars.

Safety-first is Troy’s motto. He’s your guide to a secure garage space, offering advice that puts your peace of mind front and center.


